Creating a Custom Connector for SolarWinds API Using Power Automate
In today’s digital landscape, automation is key to optimizing workflows and improving efficiency. If you’re managing IT operations or network monitoring with SolarWinds, integrating it with other tools and services can be incredibly valuable. Power Automate, part of Microsoft Power Platform, allows you to automate workflows by connecting to various services, including SolarWinds, through custom connectors.
In this blog post, we’ll walk you through the process of creating a custom connector in Power Automate to interact with the SolarWinds API. This will allow you to automate tasks such as retrieving network data, monitoring alerts, or even integrating SolarWinds with other business applications.
Step 1: Understanding the SolarWinds API
Before diving into the connector creation, it’s important to familiarize yourself with the SolarWinds API. SolarWinds provides a RESTful API that allows you to access various resources, such as nodes, alerts, and network configurations.
API Documentation:
Start by reviewing the official SolarWinds API documentation to understand the endpoints, required parameters, and authentication methods. You’ll need this information when configuring your custom connector.
Step 2: Setting Up the Custom Connector in Power Automate
- Access Power Automate:
- Go to Power Automate (https://flow.microsoft.com) and sign in with your Microsoft account.
- Navigate to Data > Custom Connectors:
- On the left menu, click on Data and then select Custom connectors.
- Create a New Custom Connector:
- Click on + New custom connector and select Create from blank.
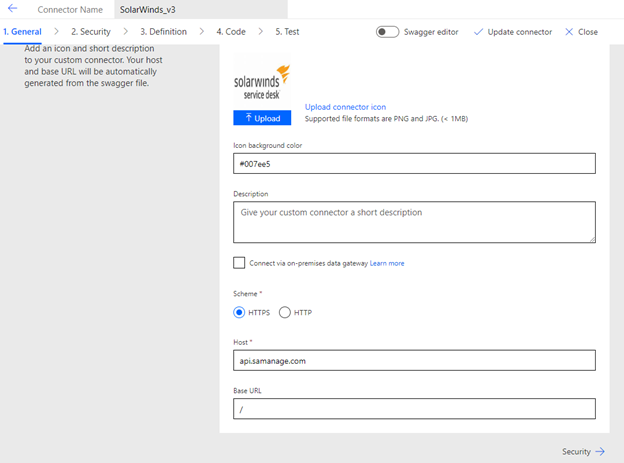
- Enter General Information:
- Name: Give your connector a meaningful name, like “SolarWinds API Connector.”
- Icon: Optionally, upload an icon that represents SolarWinds.
- Description: Provide a brief description of what the connector will do, e.g., “This connector allows integration with SolarWinds API to automate network monitoring tasks.”

Step 3: Configuring the Connector
- Set Up the Security:
- Authentication Type: Most SolarWinds APIs use Basic Authentication or API Key. Choose the appropriate method based on your API documentation.
- For Basic Authentication:
- Select Basic Authentication.
- This will prompt you to enter a username and password when creating a connection in the future.
- For API Key Authentication:
- Select API Key.
- Enter the API key details, such as the name and where it should be placed (usually in the header).
- Define the API URL:
- In the General section, set the Host to the base URL of the SolarWinds API (e.g.,
api.solarwinds.com). - Define the base path, typically something like
/v1.
- In the General section, set the Host to the base URL of the SolarWinds API (e.g.,
- Define the Connector Actions:
- Click on + New action to add an operation.
- Action Name: Enter a name like “Get All Nodes.”
- Summary: Briefly describe what the action does, e.g., “Retrieves all network nodes from SolarWinds.”
- Operation ID: This should be a unique identifier like
getAllNodes. - Request Configuration:
- Method: Select the appropriate HTTP method (GET, POST, etc.).
- URL: Enter the specific endpoint URL, like
/nodes.
- Headers and Parameters: Add any required headers (e.g.,
Authorization) and parameters as specified in the API documentation.
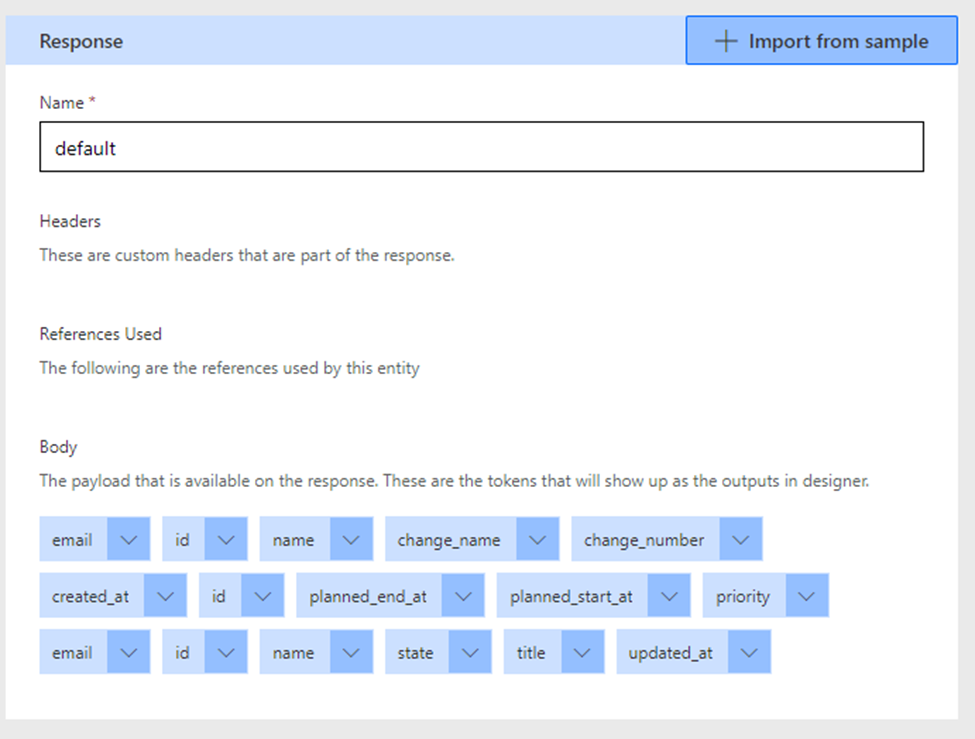
- Define the Response:
- Click on Add default response.
- Import a sample response from the SolarWinds API to define the response schema. This helps Power Automate understand the data structure and enables dynamic content in your flows.

Import Sample:
[
{
“change”: {
“id”: “10000”,
“number”: “1000”,
“name”: “Change Name”,
“description”: “description”,
“state”: “New”,
“site”: {
“id”: “1”,
“name”: “Austin TX, USA”,
“location”: “AUS”,
“description”: “”,
“time_zone”: “”
},
“department”: {
“id”: “1”,
“name”: “Support”,
“description”: “”,
“default_assignee_id”: “1”
},
“priority”: “High”,
“assignee”: {
“group_id”: “1”,
“is_user”: “true”,
“id”: “1”,
“name”: “John Doe”,
“email”: “john.doe@email.com”,
“avatar”: {
“type”: “initials”,
“color”: “#fd4165”,
“initials”: “JD”
}
},
“requester”: {
“id”: “1”,
“account_id”: “1”,
“user_id”: “1”,
“email”: “john.doe@email.com”,
“name”: “John Doe”,
“disabled”: false,
“avatar”: {
“type”: “initials”,
“color”: “#fd4165”,
“initials”: “JD”
}
},
“custom_fields_values”: [
{
“id”: “10”,
“custom_field_id”: “1”,
“name”: “Text custom field”,
“value”: “content”,
“options”: “”,
“type_name”: “Text”
},
{
“id”: “100”,
“custom_field_id”: “2”,
“name”: “User custom field”,
“value”: “1”,
“options”: “”,
“type_name”: “User”,
“user”: {
“group_id”: 1,
“is_user”: true,
“id”: 1,
“name”: “John Doe”,
“email”: “john.doe@email.com”
}
}
],
“change_plan”: “change plan”,
“rollback_plan”: “rollback plan”,
“test_plan”: “test plan”,
“planned_start_at”: “2025-01-01T00:00:00.000+01:00”,
“planned_end_at”: “2025-01-01T05:00:00.000+01:00”,
“origin”: “api”,
“created_at”: “2025-01-01T00:00:00.000+01:00”,
“incidents”: [
{
“id”: “100”,
“href”: “https://mydomain.com/incidents/100”
}
],
“problems”: [
{
“id”: “100”,
“href”: “https://mydomain.com/problems/100”
}
],
“changes”: [
{
“id”: “100”,
“href”: “https://mydomain.com/changes/100”
}
],
“solutions”: [
{
“id”: “100”,
“href”: “https://mydomain.com/solutions/100”
}
],
“releases”: [
{
“id”: “100”,
“href”: “https://mydomain.com/releases/100”
}
],
“configuration_items”: [
{
“id”: “100”,
“href”: “https://mydomain.com/configuration_items/100”
}
],
“purchase_orders”: [
{
“id”: “100”,
“href”: “https://mydomain.com/purchase_orders/100”
}
]
}
}
]
Step 4: Testing the Connector
- Test the Connection:
- After setting up your custom connector, navigate to the Test tab.
- Enter the required credentials (username, password, or API key) and click Test operation.
- Review the response to ensure the connector retrieves the data correctly.
- Refine the Connector:
- If necessary, go back and adjust the connector settings based on your test results.
- Ensure that the connector is handling errors gracefully and that all necessary endpoints are covered.
Step 5: Using the Custom Connector in Power Automate
- Create a Flow:
- Now that your connector is ready, you can start using it in your Power Automate flows.
- Create a new flow and add an action that uses your SolarWinds API connector.
- Automate a Task:
- For example, you might want to automatically retrieve and log network alerts every hour, or trigger an alert in Teams when a critical network node goes down.
- Monitor and Optimize:
- As you implement the connector in various workflows, monitor its performance and adjust as needed. Optimize the flow logic to ensure efficiency and reliability.
Conclusion
Creating a custom connector for the SolarWinds API in Power Automate opens up numerous possibilities for automating network monitoring and management tasks. By following the steps outlined in this guide, you can integrate SolarWinds with other applications and services, enhancing your IT operations’ efficiency and responsiveness.
Whether you’re looking to automate routine tasks or create complex workflows that span multiple systems, a custom connector is a powerful tool in your automation toolkit. Get started today and see how you can streamline your processes with Power Automate and SolarWinds!